In this tutorial, we’re going to learn how to design a social profile user interface (UI) in Adobe Illustrator.
The Steps (1-18)
1. Create a new document, 3000 x 3000 pixels, with the colour mode set to ‘RGB.’
2. Using the Rectangle Tool, select a light grey and draw a four-sided shape that covers the entire artboard. You can then double-click the layer name in the Layers palette and rename the layer to ‘Background’, and click in the empty box alongside to lock the layer (you should see a padlock icon appear to confirm that the layer has been locked).
3. Create a new layer from within the Layers palette, give this layer a name of your choice, and then paste in the profile photo that you wish to use. Make sure that this new layer is above the ‘Background’ layer. Move the photo off of the artboard for now, and we’ll come back to this later in the tutorial.
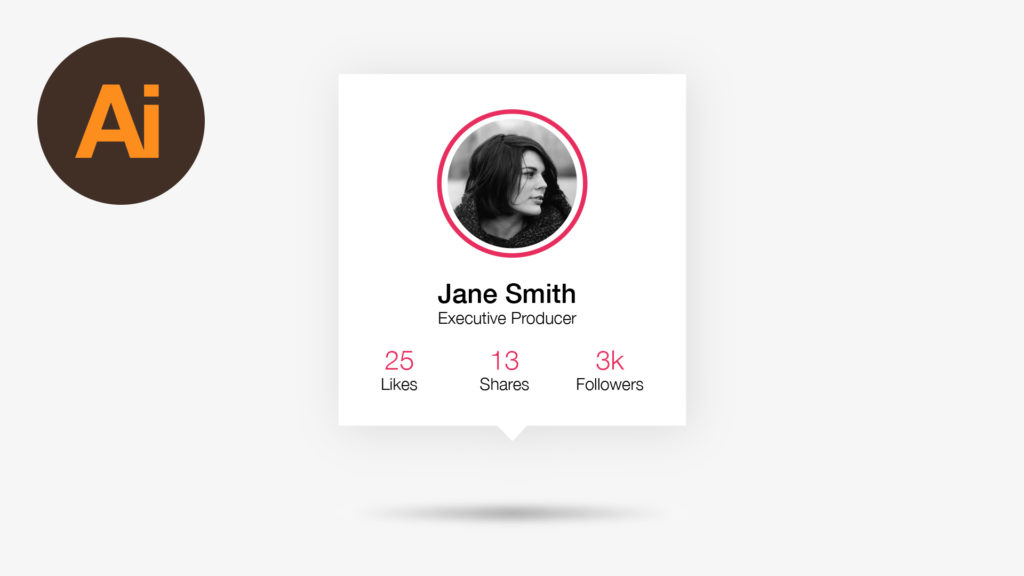
4. Using the Rectangle Tool, draw a new four-sided shape (approximately 775 x 490 pixels). Give this shape a fill colour of white.
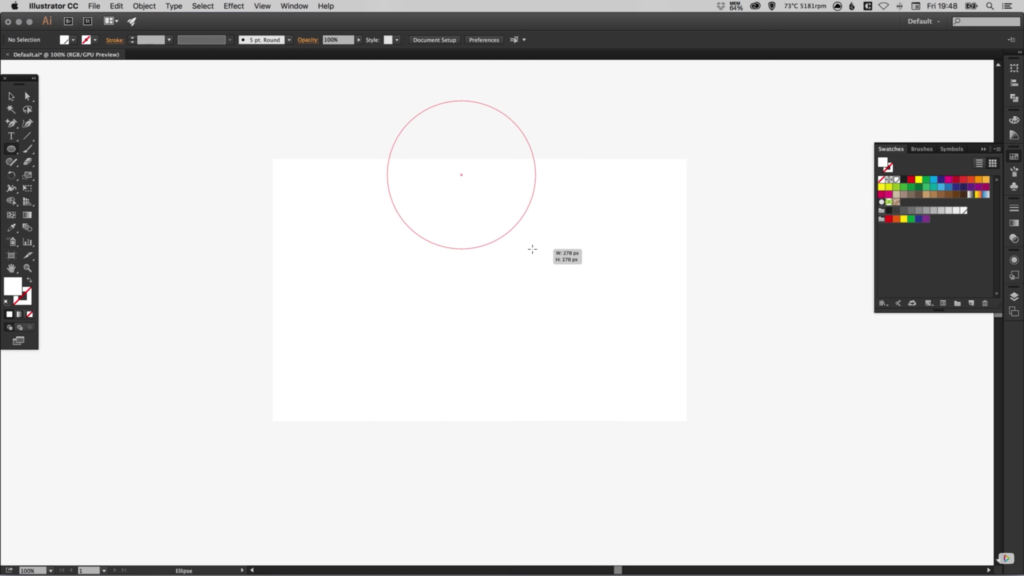
5. Select the Ellipse Tool, and hold Shift to draw a circle (approximately 290 x 290 pixels). Fill with any temporary colour for now, and align the circle centrally inside the rectangle that we created in Step 4. Different shades of grey are particularly useful when working on a layout to get the basic structure, and can then be refined later in the design process.
6. Select the Type Tool and click anywhere on the artboard to start typing a number of your choice, then press Return and type the word ‘Likes’.
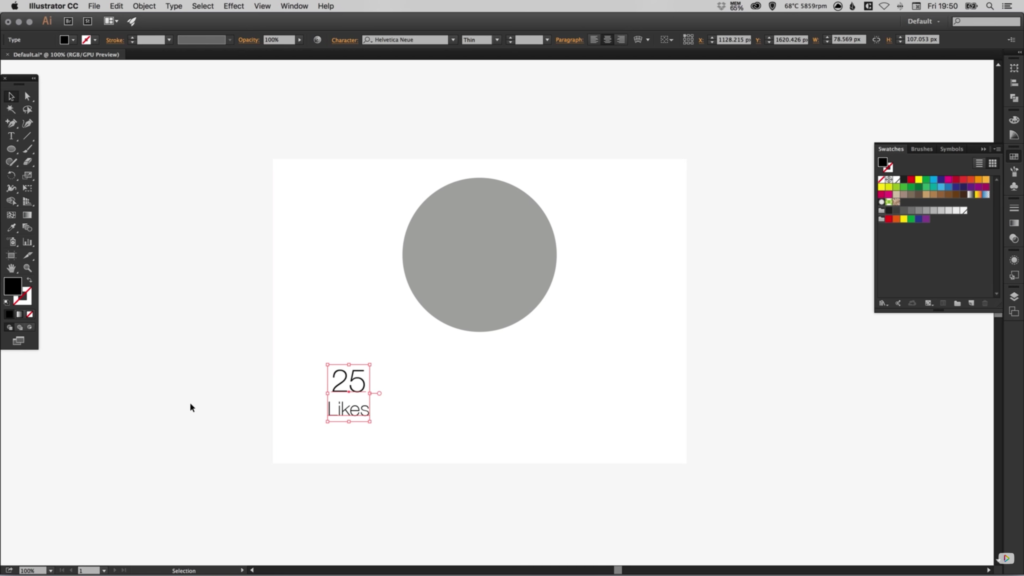
7. Select central text alignment, pick a font, and style using bold/italics as desired.
8. Position the new text object in the bottom left corner of the rectangle, with plenty of space from the left/bottom edge.
9. Copy/Paste the text object two more times, and spread all three horizontally across the width of the rectangle. Use the alignment options if necessary to distribute the 3 text objects equally apart. The numbers can also be adjusted, as well as the titles. For example, consider using Shares, Downloads, Followers etc as ideas for titles.
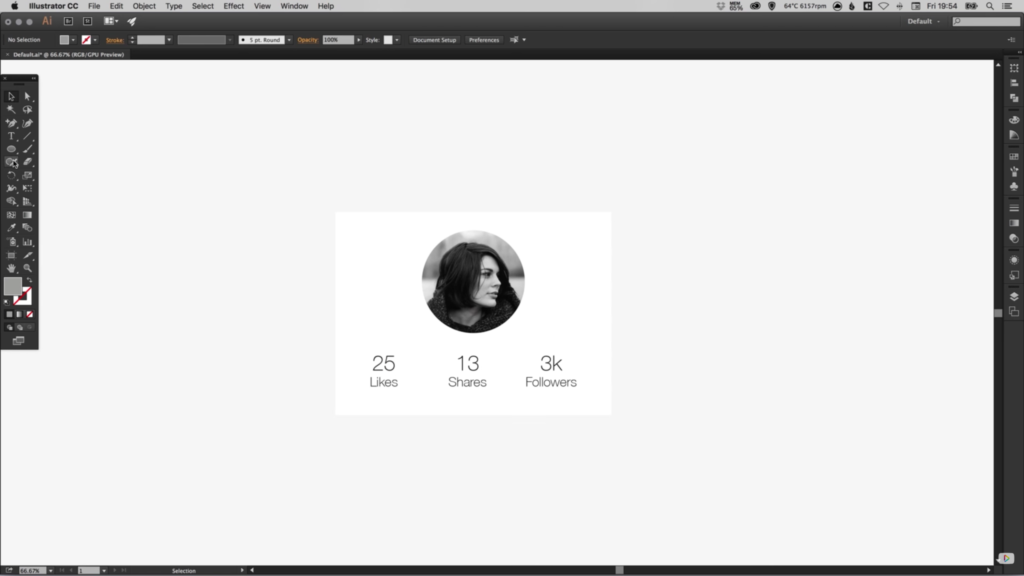
10. Remember the profile photo that we put to one side earlier? Move the photo over half of the circle, so part of the circle is still visible. Then select Object > Arrange > Bring to Front to ensure that the circle is on top.
11. Select both the circle and photo together holding Shift when selecting, and then go to Object > Clipping Mask > Make. This will crop your photo inside the circle shape. Double-click on this object to now go inside of the shape and adjust the crop of your image. To then exit that specific object group, click the arrow pointing left, in the upper left corner of the document window.
12. Next, we can create a circle with similar dimensions to the profile photo, remove the fill, and give this shape a stroke width and colour as desired. This step is optional, adding a border around your profile photo.

13. Select the Polygon Tool and specify creating a shape with 3 sides (triangle). Select white as the fill colour for this shape, reduce in size, and position centrally and underneath the main rectangle, ensuring that the triangle is pointing in a downwards direction.
14. Ensure that both of these shapes are touching, and in the Pathfinder palette, select the Unite option to merge these two shapes into one shape.
15. Using the Ellipse Tool, create a narrow ellipse that is a similar width to the main rectangle, and position this underneath. With this shape selected, open the Gradient palette and create a new gradient that has black on the left and right sides, with white in the centre. You can drag swatches from the Swatches palette on to the Gradient Slider to add these to your gradient.
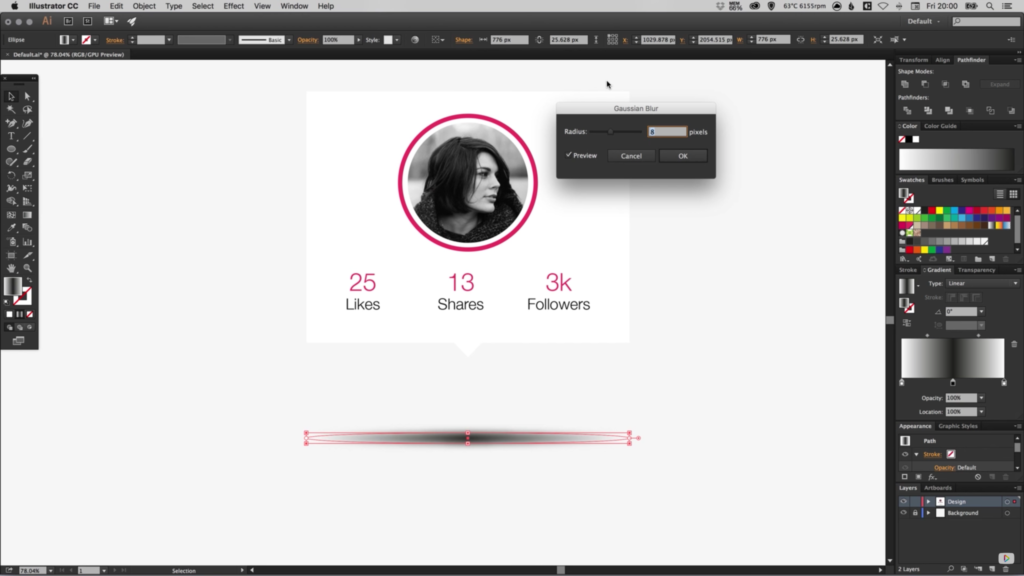
16. The next step is to go to Effect > Blur > Gaussian Blur, and specify a value for the desired amount of blur. The aim here is to create a ‘floating shadow’ for the main rectangle, and you can adjust the amount of blur accordingly. The overall opacity of this shadow can also be adjusted in the Transparency palette.
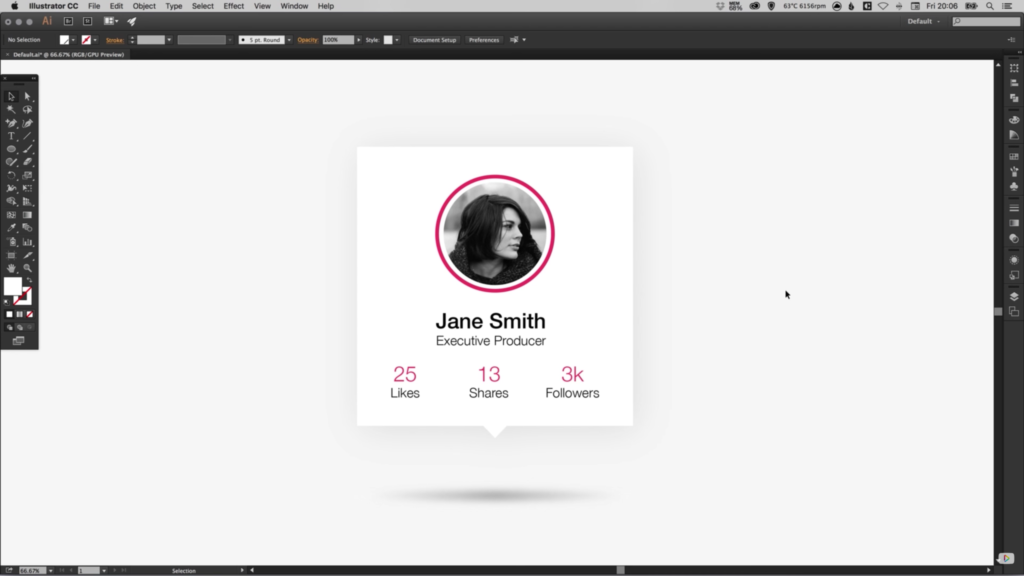
17. Increase the height/width of the main rectangle as required to add any other additional details. For example, this could be someone’s Name, Job Title, or a Description etc.
18. Select the main rectangle, and go to Effect > Stylize > Drop Shadow, to specify any drop shadow settings. Adding a subtle shadow can help create a little more distinction between the light grey background, and the white used for the main rectangle.
Download Adobe Illustrator CC.
Read More at How to Design a Profile UI in Adobe Illustrator
from Web Design Ledger http://webdesignledger.com/design-profile-ui-adobe-illustrator/
No comments:
Post a Comment