
In this tutorial, we’re going to learn how to quickly add multiple images in Adobe Experience Design CC (Adobe XD).
The Steps (1-11)
1. Create a new document by selecting iPhone 6 from the Start Screen.
2. Select the Rectangle Tool and hold Shift to draw a square that fills the entire width of your artboard. Alternatively, you can enter the width and height of 375 pixels in the Property Inspector on the right-hand side with the shape selected.
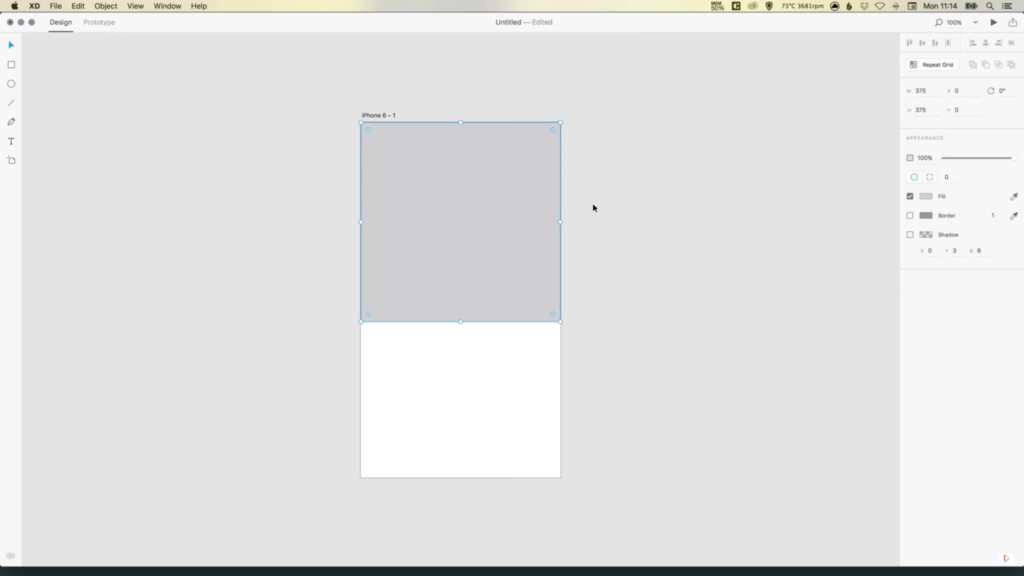
3. Give the square a fill colour of your choice.
4. The artboard width is 375 pixels, and in order to display additional images below across 3 columns, we must divide the artboard width by 3 (375/3 = 125).
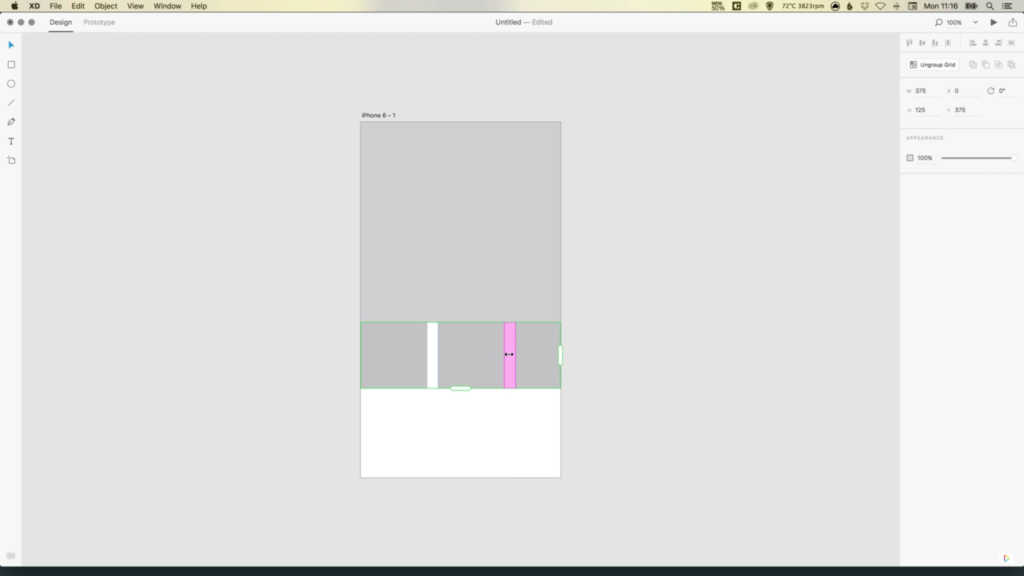
5. Select the Rectangle Tool and holding Shift create a new square, and give this shape a width and height of 125 pixels. Position this shape directly under the larger square, and align to the left edge of the artboard.
6. Select the smaller square and then click the Repeat Grid button in the Property Inspector on the right-hand side.
7. Notice the green border that appears around your content? Select the right slider and drag this to the right to repeat the square, and create the three image placeholders.
8. When using the Repeat Grid Tool, Adobe XD automatically creates a gutter (spacing) in between the different objects that are being repeated. By selecting and clicking inside this space (the gap in between objects) you will see that some pink guides appear, that allow you to adjust the gutter spacing. For this tutorial, reduce the spacing here to zero, then drag the green slider to the right so that it touches the edge of the artboard once again.
9. Next, drag the bottom green slider down, and repeat Step 8 to reduce the gutter spacing to zero.
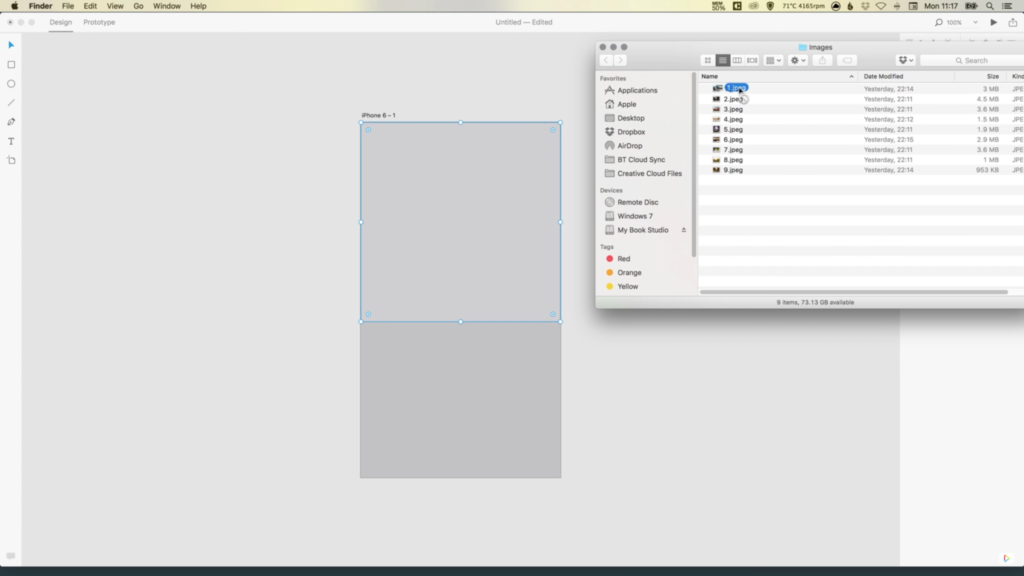
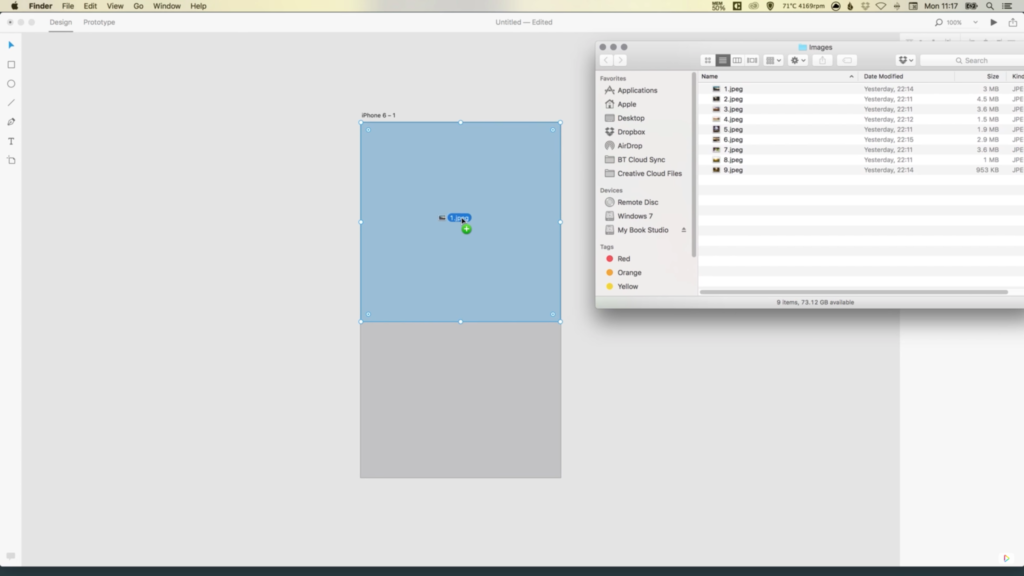
10. Select the larger square, and from your window/desktop drag your featured image on to the square, and it will automatically import this image into the document to occupy this space.
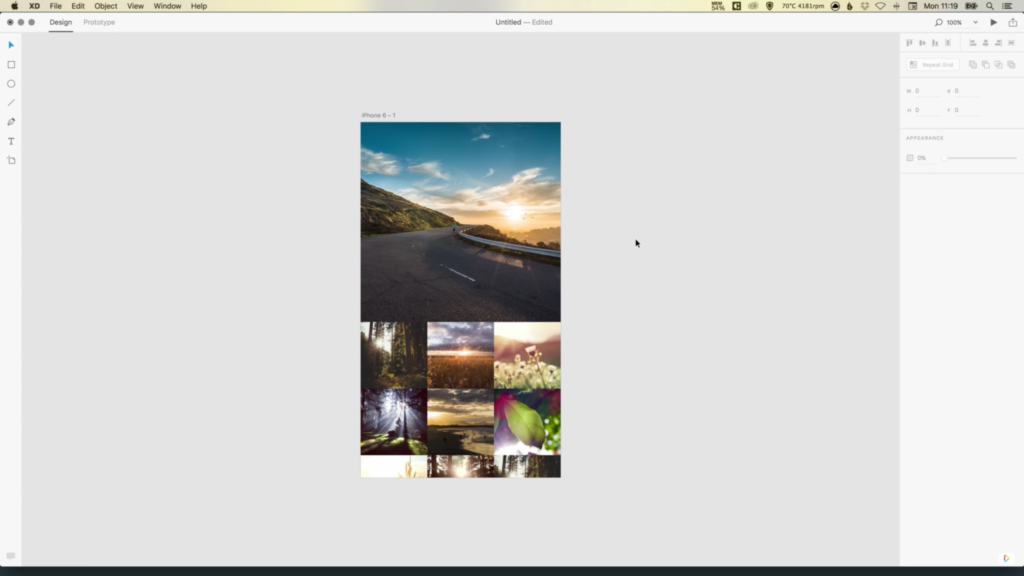
11. Next, hold Shift and select all of the other images that you wish to import (remember, the order in which you select these images, is the order that they will appear when imported into Adobe XD), and drag these on to that first smaller square that we created. Adobe XD will then automatically populate all of the other small squares with your selected imagery.
Download Adobe Experience Design CC (Adobe XD).
Read More at How to Quickly Add Images in Adobe XD
from Web Design Ledger http://webdesignledger.com/quickly-add-images-adobe-xd/
No comments:
Post a Comment