
In this tutorial, we’re going to learn how to create gradients in Adobe XD.
The Steps (1-6)
1. Create a New Artboard in Adobe XD.
2. Select the Rectangle/Ellipse Tool and draw a shape, ensuring that the shape has a solid fill and no border.
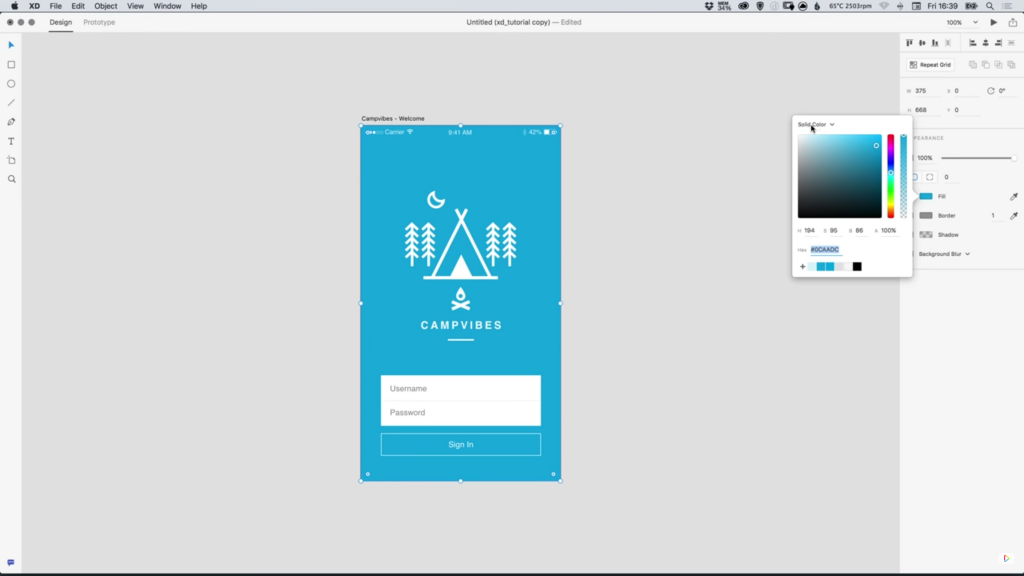
3. With the shape selected, Left-click the Colour Picker from the Property Inspector, and from the dropdown menu at the top select Gradient. A gradient will be applied to your shape’s fill using two colours by default.
4. Left-click each swatch on the Gradient Slider and select your preferred colours as desired. New colours can be added by simply Left-clicking anywhere on the Gradient Slider, and colours can be removed by Left-clicking and dragging the swatches directly off of the Gradient Slider.
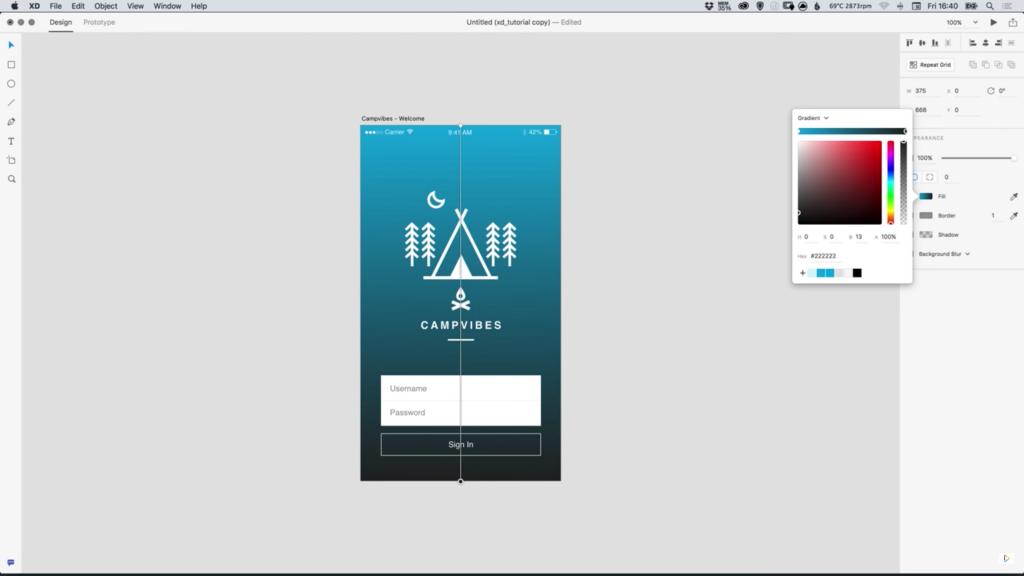
5. When a gradient is applied to a shape, a line connected by two dots is displayed upon opening the Colour Picker, this can be used to adjust the Angle of the gradient, as well as the Spread.
6. For a ‘harder’ division between two colours, drag the dots at either end of the line closer together. On the other hand, if you would like a smoother and more gradual gradient, simple move the dots further apart.

Download Adobe Experience Design CC (Adobe XD).
Read More at Creating Gradients in Adobe XD
from Web Design Ledger https://webdesignledger.com/creating-gradients-adobe-xd/
No comments:
Post a Comment